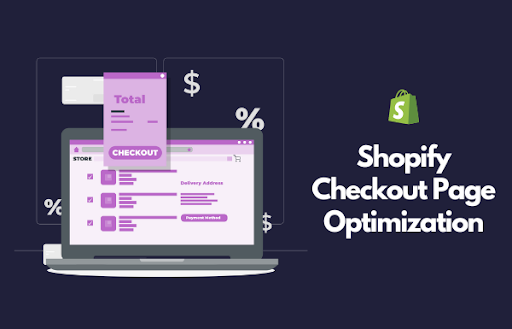
The Shopify One Page Checkout page is Awesome! But do you think that’s enough to reduce your cart abandonment rate? There are many reasons which may lead shoppers to exit your online store during the checkout process.
Some of the common reasons for Shopping cart abandonment are:
- Too much information to fill in
- Long and confusing checkout
- Couldn’t find a coupon code
- Concerns about payment security
- No “express shipping” available
- Unexpected shipping cost
- Having to create a new user account
That’s why you should consider optimizing the Shopify checkout page to build a powerful checkout experience that can increase conversions, sales, and revenue.
In this guide, we’ll take a look at some of the best ways to optimize your Shopify checkout page and reduce the abandoned carts.
Shopify One page Checkout
Shopify provides your customers a fast, easy, and secure checkout process with a one-page checkout. It allows them to complete their purchase with a single-page checkout, eliminating the need to go through multiple steps.
The Shopify checkout page is consist of 4 checkout steps:
- Shopping cart
- Customer information
- Shipping details
- Payment details
Shopify Checkout will also automatically save the filled information so it’s easy for your customers to come back later and complete the rest of their order.
Read More: Shopify Thank You Page Customization Guide (10 Ideas)
Benefits of Optimized Shopify Checkout
No matter how many people visits your online store, one of the most important is the number of people who purchase after visiting your website. If you have a clear and concise checkout process, it will attract more customers who will make purchases from your site.

In addition to this, other benefits come from having optimized checkout pages on your Shopify store:
1. Improved Shopping experience
Having a well-optimized and personalized checkout page is key to ensuring that your customers have a pleasant experience with your brand.
Most shoppers prefer payment from their preferred digital wallets. By enabling more payment options you can make the checkout process hassle-free for your customers. And this will improve the overall shopping experience for your customers with your online store.
2. Better Conversion Rates
The Shopify checkout page is one of the most important pages for converting visitors into customers. When customers get custom checkout options they are more likely to complete the transactions.
Optimizing your Shopify checkout will increase conversion rates by providing customers with the right experience when they come to make a purchase.
3. Quick Purchase
By providing express checkout solutions you can cut down unnecessary steps from the checkout process and offer a fast checkout experience to your buyers. Therefore, customers can enjoy buying stuff with just one click at your Shopify store.
Now, let’s see the best ways to optimize your one-page checkout in your Shopify store.
How to optimize the Shopify checkout page?
It’s important that your checkout page is clear, simple, and easy to navigate. And it should be optimized for conversion.
10 best ways to optimize your Shopify checkout:
1. Customize your Shopify Checkout page
The one-page checkout in Shopify is common for all. But the updated theme editor of Online Store 2.0 allows merchants to customize the checkout page as per their needs.
To customize the Shopify checkout page, follow the steps below:
- Log in to your Shopify Admin.
- Go to Online Store > Themes.
- In the Current theme section, click on Customize to open the theme editor.
- Now, open the checkout page template from the drop-down.
- From the left panel, click on Open Checkout settings.
- In Theme Settings, scroll down to Checkout.
- Save the changes.

You can also edit the Label text on the checkout page to make it more personalized for your shoppers. For that,
- Go to Settings > Checkout and accounts from your Shopify Admin.
- Scroll down to Checkout language.
- Click on Manage Checkout language.
- In the Checkout & system tab, you can add custom text for the labels you want.
- Save the changes!

2. Make it fast with Single-click checkout
Your repeated customers are much familiar with your brand and products. In a case, they know what they exactly want, they won’t like to have many navigation or pop-ups. Therefore, you should make sure you’re getting them in and out of your website as quickly as possible.
You can enable one-click checkout in your store by placing a Buy it now CTA on your product page. The “Buy Now” button takes the customers directly to checkout, thus speeding up the checkout process.

Single-click checkout eliminates the need for users to click around your website or click through unnecessary pages (the shopping cart) before completing their purchase. This means that you can increase conversion rates by up to 30% – or more!
3. Add multiple payment options
Adding card information can slow down the checkout process of your customers. Shopify allows you to use third-party accelerated checkout methods (also known as “Express checkout”).
To display third-party dynamic checkout buttons on your product page or checkout page, you need to enable the payment method first in your payment setting.

You can add the following third-party accelerated checkout methods:
- Shop Pay
- Google Pay
- Amazon Pay
- Apple Pay
- PayPal
- Venmo
This way Shopify Checkout makes it easier for users to submit payments using the most convenient payment method to complete an order – saving them time and helping keep them engaged with your brand.
Read More: 10 Best Payment Methods for Shopify Store
4. Minify the Information Forms
This is a great way to increase conversions because more people are likely to complete their purchases when they don’t have to wait long before filling out all the fields and clicking on submit button.
You can minify the Shopify Checkout Form by removing some of its unnecessary fields like the first name, company name, address line 2, phone number, and so on.
From your Shopify Admin, go to Settings > Checkout and accounts and scroll down to customer information. You can remove unnecessary fields from your checkout page.

This will make it faster for your customers and will allow them to complete their purchases in a short period of time.
5. Let them choose a Delivery method
There are different delivery options available in Shopify that you can enable to let your customers choose the best delivery method for their needs. This will improve their checkout experience.
For example, if you have a physical store, you can offer store pick-up to your local shoppers.

Here’s how to enable Local delivery or pickup for Shopify checkout:
- From your Shopify Admin, go to Settings > Shipping and delivery.
- In the Local Delivery section, click on Doesn’t offer delivery besides the location.
- Now select the This location offers local delivery checkbox and fill in the zone details.
- Save the changes!
In the same way, you can configure the Local Pickup.
Same as the delivery methods, you can offer different shipping methods to your customers such as — Standard and Express.
Read More: 10 Best Shopify Shipping Apps for your Online Store
6. Offer a Scan & Pay Option
QR Code payment is very trending these days as the user doesn’t have to enter the data and there are very lower chances of mistakes. Therefore, most mobile users prefer scanning the QR code for any transaction.
You can offer the “Scan and pay” method on the checkout page to complete their payment within a minute.

Need help adding QR Code payment to your Shopify site? Talk to our Shopify Experts!
7. Place Upsells or Cross-sells on Checkout
One of the best ways to boost conversions or sales on your Shopify one-page checkout is by offering related products with an attractive discount. There are many other ways to add upsells and cross-sells on the Shopify checkout page such as —
- Send the order as a gift
- Combine the order with a subscription
- Motivate to increase cart value for Free Shipping
And many more…
Here’s an example of a checkout upsell for your reference!

I’m not sure whether a Shopify checkout app can help you achieve this!
But if you are looking for a custom checkout page, we want to help you! We offer the best Shopify Development Services and we can help you with custom development for your checkout page.
8. Add Some Trust Badges
Trust badges are the most important part of your eCommerce site and are very effective when you want to make your shoppers believe in your brand. Therefore, you should not only add eCommerce trust badges [1] to your product pages or footer but also consider showing them on the checkout page.
Types of trust badges you can add to your one-page checkout:
- Security trust badges
- Payment trust badges
- Guarantee trust badges
- Shipping trust badges
They let your customers know that you’re reliable, trustworthy, and professional, so they’ll feel confident about having purchase with you.

There are many Shopify apps available that will help you add different badges to your Shopify stores.
9. Be Specific about Delivery Dates
One of the important things, customers are concerned about during their purchase is the delivery date. Therefore, when you customize the one-page checkout, make sure you include the estimated delivery date for the orders.
If the processing of the orders takes a certain time (i.e. 1-2 business days), you can add it to your delivery date automatically from your Shopify Admin. This will help you to show the nearest date when the package will be delivered.
Here’s how to add processing time to the order delivery in Shopify:
- From Shopify Admin, go to Settings > Shipping and delivery.
- In the Processing time section, click on Manage.
- Check the Use processing time to show delivery dates at the checkout option.
- Select your processing time from the options given. You can also refer to the Preview for better selection.
- Save the changes!

10. Offer Guest Checkout options
Allowing the Guest purchases is the best option you can offer to the shoppers who are in hurry and don’t wish to go through user registration. When you force new users or first customers to create an account and log in to your eCommerce site, most of them may leave your store.
To solve this problem, you can enable a guest checkout option in your Shopify store. Follow the steps below:
- Log in to your Shopify Admin.
- Go to Settings > Checkout and accounts.
- In Customer account settings, select the Show login link in storefront and checkout option.
- Then, select New customer accounts.
- Save the changes!
This will help them avoid the hassle of creating an account.
Here is an example of a guest checkout page:

Quick Recap!
The Shopify single-page checkout is much faster than two-page or multi-page checkout forms. The average user spends less than two minutes on a website before abandoning their shopping cart and going elsewhere. With Shopify One Page Checkout, you can reduce abandonment rates by up to 20%.
In this article, you learned how you can optimize your Shopify one-page Checkout to boost users’ personal experience and your store sales.
Hope you enjoyed the read and the information was helpful for your eCommerce business. Apart from the information, if you feel you need expert help with the configuration, you can opt for our Shopify store setup services anytime!