Without a clear and intuitive navigation menu, it can be difficult for customers to find what they are looking for on your site. This may cause leading to frustration and potentially even lost sales. You may have products or categories that simply don’t fit neatly into the default drop-down structure, resulting in a cluttered or disorganized menu.
In this tutorial, we will show you how to add a nested drop-down menu to your Shopify store, allowing you to create a more comprehensive and user-friendly navigation experience for your customers.
By the end of this tutorial, you will have a clear and intuitive navigation menu that will make it easy for your customers to find what they are looking for on your site.
So let’s get started!
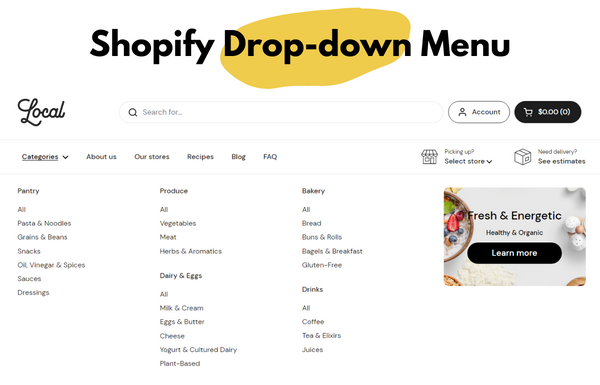
Shopify Drop-down Menu

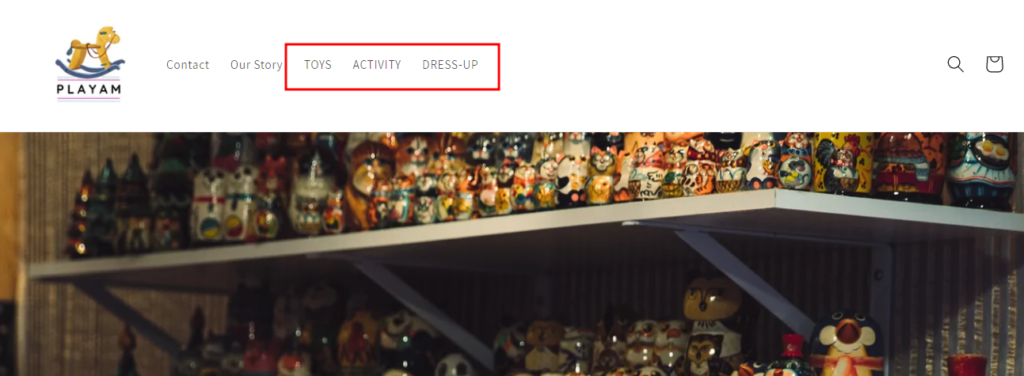
When you’ve got too many categories, pages, or products, it’s difficult to arrange them all in a single header menu. So, here comes Shopify drop-down menu!
To make the store navigation more organized and concise, Shopify allows you to create drop-down menus so that your shoppers can easily and quickly access the categories they are looking for.
I know you may have more questions in your mind. So, here are some frequently asked questions about Shopify drop-down menus:
1. What are drop-down menus?
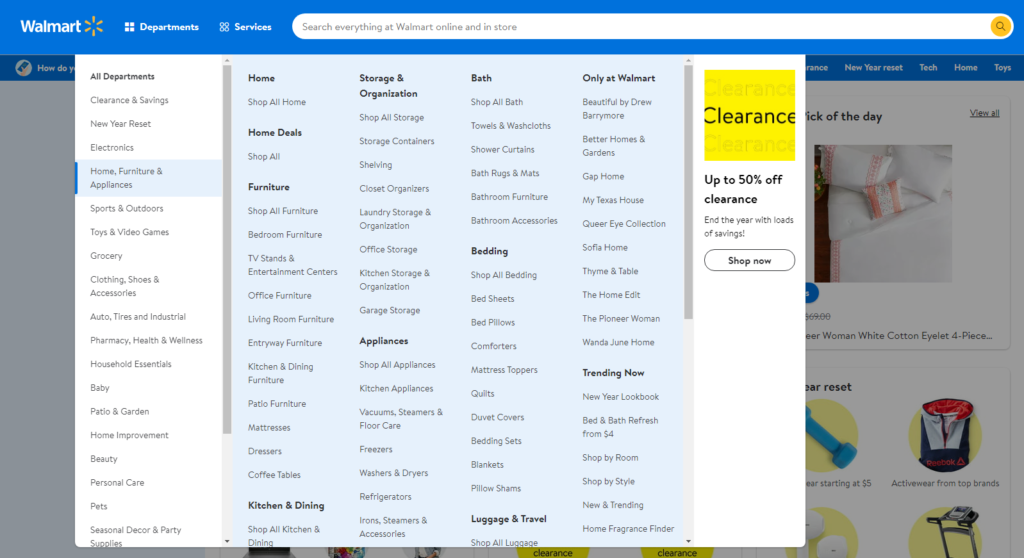
A drop-down menu is an essential element of any e-commerce website, allowing you to manage product categories, collections, and pages to organize the store navigation.
These menus can be used to create submenus for deeper navigation so that website visitors can easily find the products they want to purchase.
2. Can I customize the appearance of my drop-down menu?
Yes, you can customize the appearance of your drop-down menu in Shopify. You can choose the font, font size, and color of the text, as well as the background color and border of the menu from the theme settings.
You can also add custom CSS if you want to further customize the appearance of your menu. For that, you should take the help of a Shopify expert.
3. Can I add external links to my drop-down menu?
Absolutely, you can add external links to your drop-down menu or online store navigation. You just need to add the external link in the link field of the menu item.
4. Can I add images to my drop-down menu?
Yes, you can add images to your drop-down menu. You may not find the image option in the free Shopify themes. You can pick any premium Shopify theme that supports custom drop-down menus or adding images in the navigation menu items.
5. Can I create multiple drop-down menus in Shopify?
Yes, you can create multiple drop-down menus in Shopify.
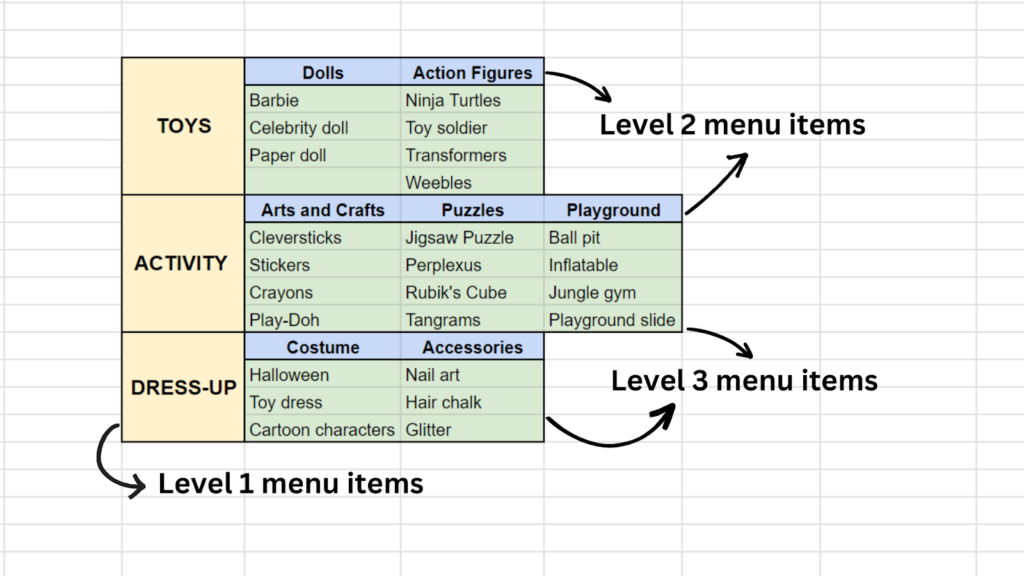
6. At what level I can display nested items in the main menu?
You can have up to two levels of nested menu items within a main menu item.
For example,
Women
- Apparels
- Dress
- T-shirt
- Swimsuit
- Jewelry
- Ring
- Earring
- Necklace
Here, “Women” is the main menu item (top-level menu), whereas “Apparels” and “Jewelry” are the first level of the nested menu and the menu items such as “Dress, T-shirt, Swimsuit, Ring, Earring, Necklace” comes in the second level of the nested menu.
After understanding the basics about Shopify drop-down menu, let’s go through the steps to create a drop-down menu in the Shopify store.
How to Add Drop-down Menu in Shopify
Before you jump directly on the steps, make sure you’ve prepared the following things:
- a rough structure of your drop-down menu
- all the collections you will be adding to the menu items
- all the pages you need to add to the menu items
Here I am going to create a drop-down menu based on the structure I created earlier:
Let’s create the multi-level drop-down menu based on the structure given above.
Creating menu items
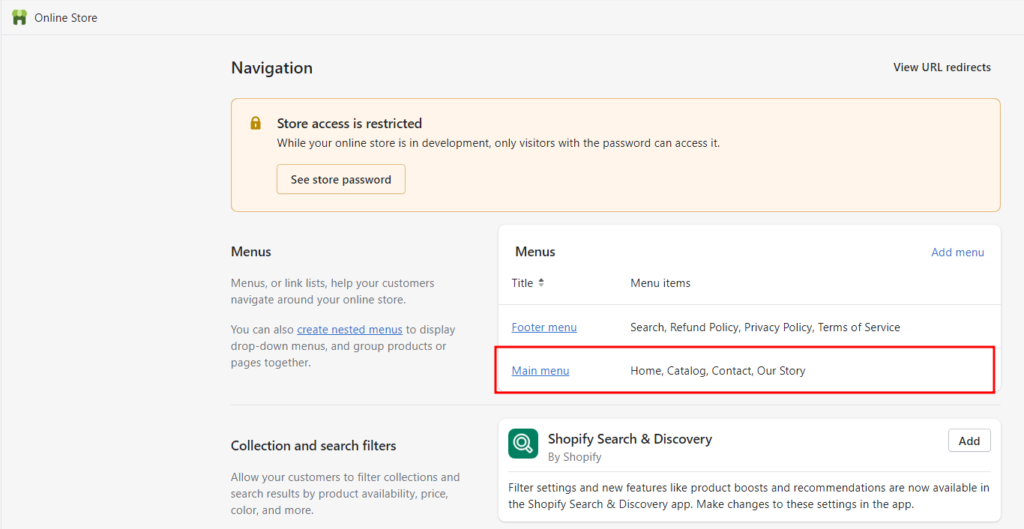
- Step 1: From the Shopify admin dashboard, open the Navigation page, i.e., go to Online store > Navigation.
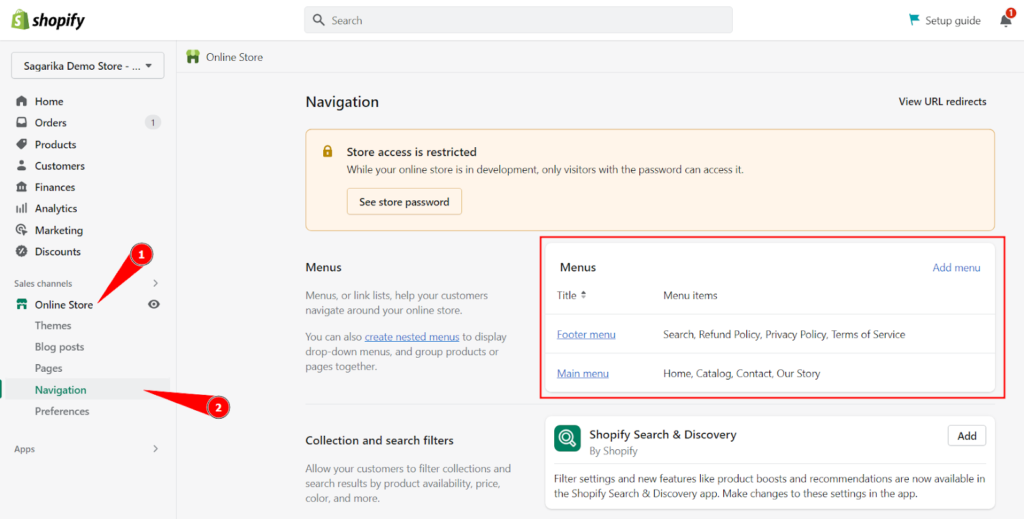
Here you can find the menus available in your Shopify store. By default, there are 2 menus: (1) Footer menu and (2) Main menu.
As we want to create a drop-down menu for the header section of the site, we shall go with the Main menu.
- Step 2: Click on the Main menu link.
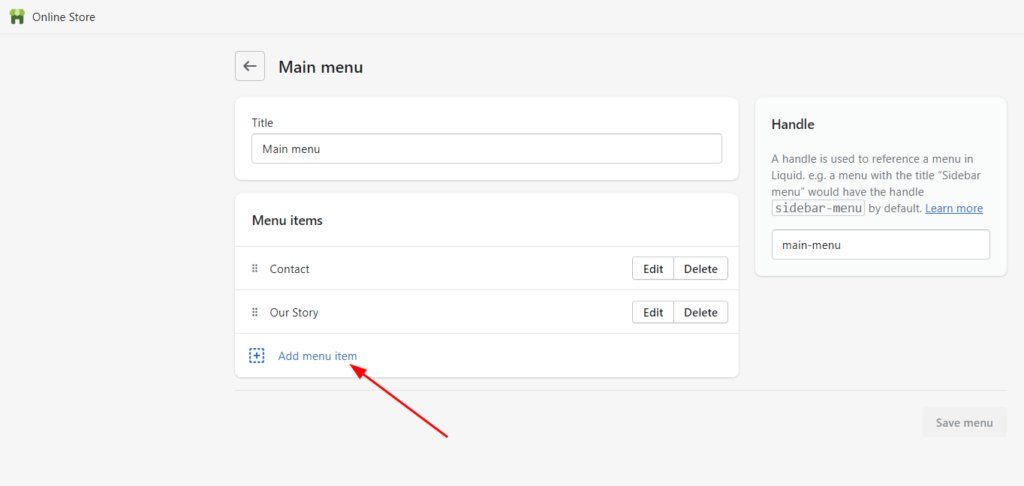
You can some menu items are already available in the main menu. If you want to change or remove some of the menu items, you can do it using the “Edit” or “Delete” button.
Now we shall add menu items one by one to the main menu. Make sure to add all the items in the drop-down menu structure. And start with the top-level items first!
- Step 3: Click on Add menu item in the Main menu.
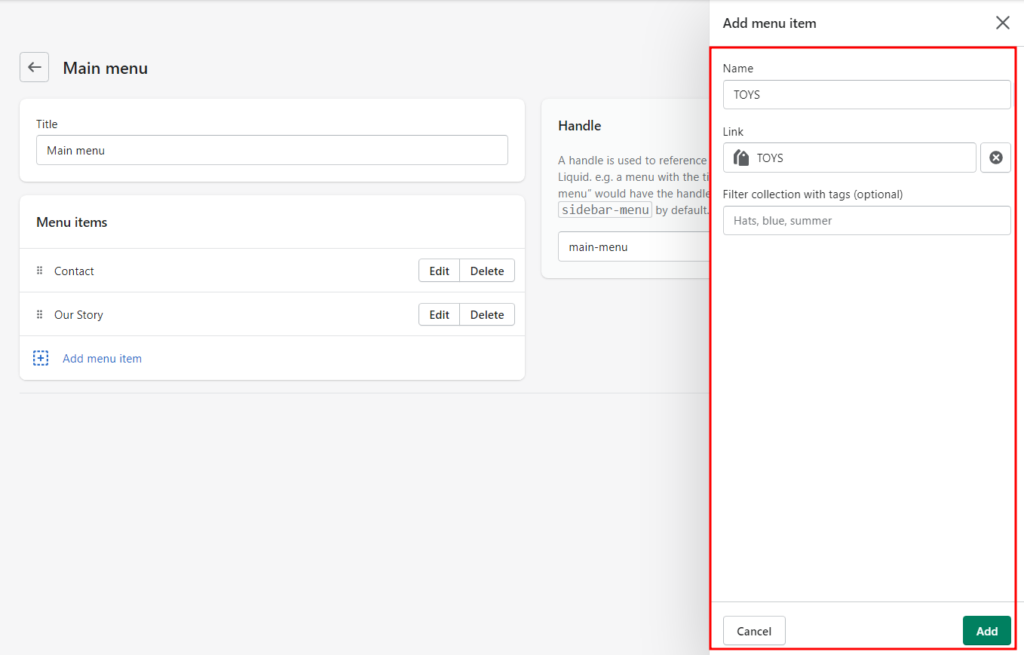
- Step 4: In the “Name” field, enter the name you want to use for the new menu item.
- Step 5: Now click on the “Link” field, and select the page or collection that you want to add to the navigation link.
- Step 6: Click the Add button to add the menu item to your store’s navigation.
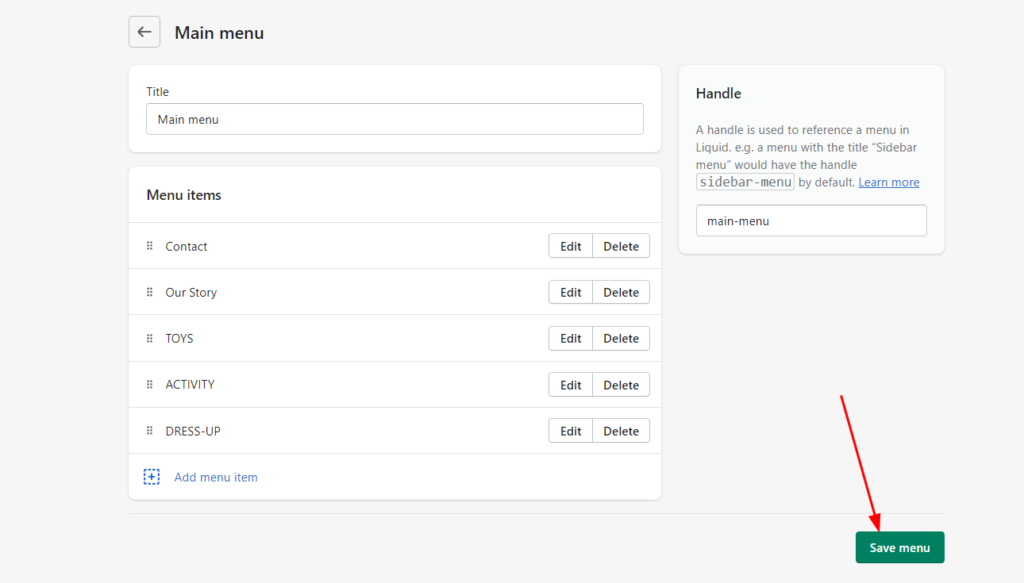
- Step 7: Repeat Step 3 to 6 until you add all the menu items to the main menu.
- Step 8: Once all the menu items are added, click Save menu button.
Adding only the top level item will create a single menu item without drop-down as shown in the below image:
So, make sure you add all the menu items for three menu levels before you proceed further.
After adding all the menu items to the main menu, now let’s prepare the multi-level drop-down menu for your Shopify store.
Organize Multi-level Navigation Tree
It’s quite easy and you will feel like playing a fun game!
To make the navigation tree you just need to grab the six dot icon next to the menu item and drag it up, and place it to the right, under the top-level item.
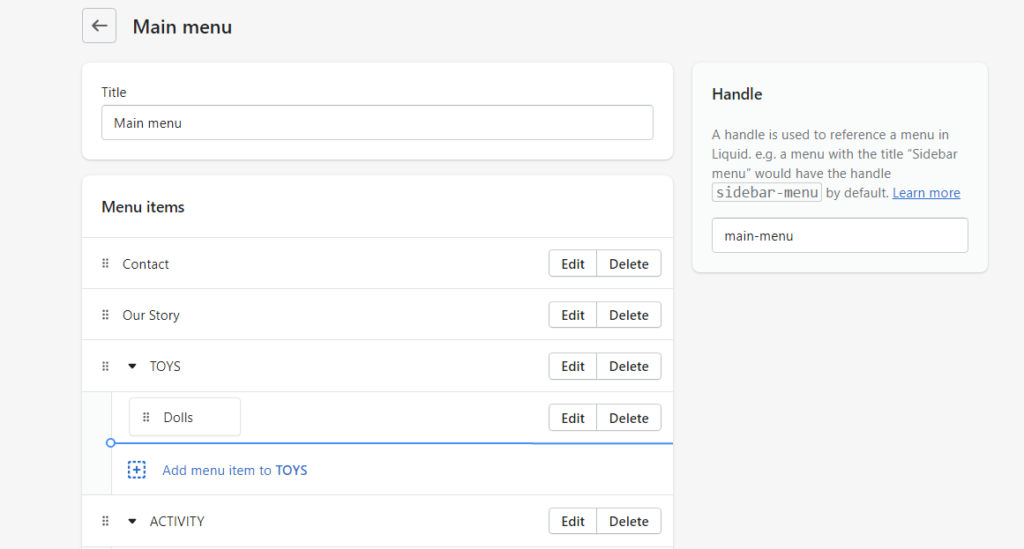
After adding the first 2-level menu item, you can find an option to add a drop-down menu item directly under the top-level item.
Add all the 2-level menu items under the top-level items respectively!
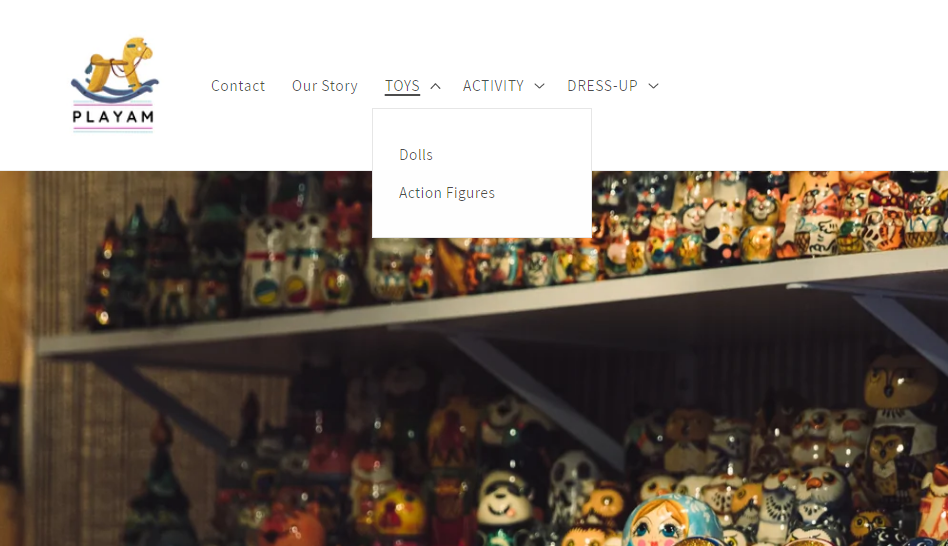
It will look like this:
Now, time to create the 3rd-level menu items in the navigation menu.
Simply grab the six dot icon next to the menu item and drag it up, and place it to the right, under the 2-level menu item.
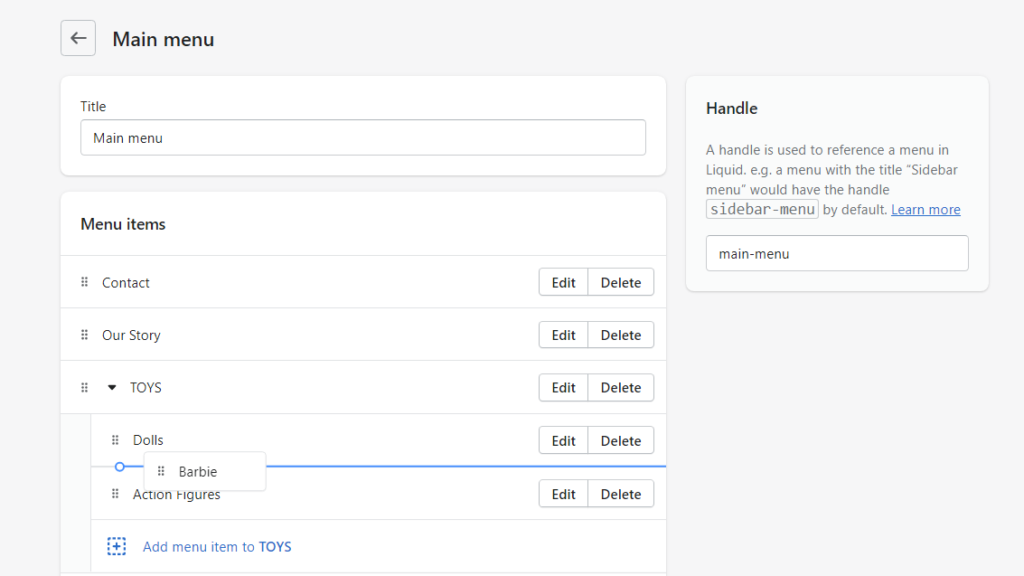
Now, keep moving menu items under the 2-level items respectively!
So, here’s how the navigation tree will look in the Shopify admin.
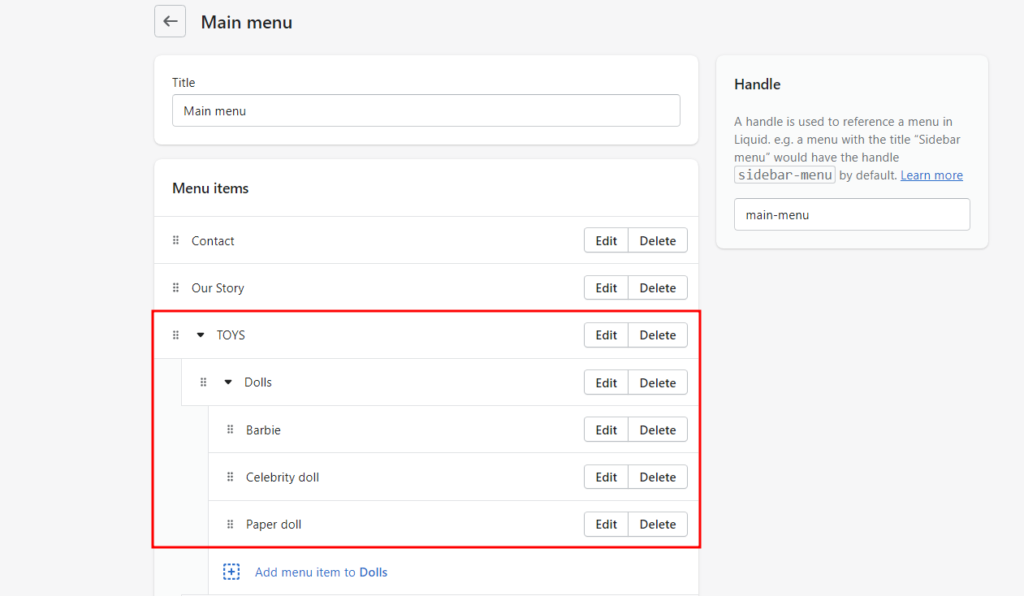
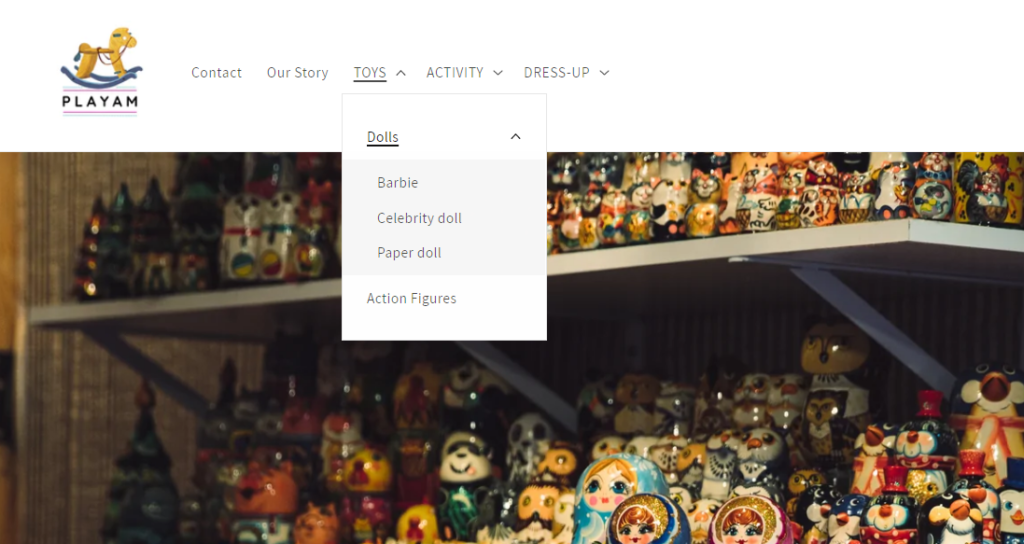
DO NOT forget to save the menu once you’re to save your time and effort! Now, let’s check how the drop-down menus look on the online store.
So, here’s how you can create a drop-down menu in Shopify!
If you find it difficult to set up the multi-level navigation menu in your online store, let our Shopify store setup team help you.
Wrapping Up!
Congratulations on making it to the end of this tutorial! By now, you should have a fully functioning nested drop-down menu on your Shopify store, all without having to write a single line of code.
Not only will this new feature make navigation on your site easier for your customers, but it will also help improve the overall user experience and potentially increase sales.
Adding a nested drop-down menu may seem difficult at first, but as you can see, it can be easily accomplished by following the steps given in this blog. Don’t be afraid to play around with the navigation options and really make the menu your own.
We hope this tutorial has been helpful and has given you the confidence to add and edit your own nested drop-down menu. If you have any questions, let us know in the comment box!