
Once you have decided to build a new Shopify store, there are a few key steps you need to take to get everything set up and ready for customers. This Shopify setup checklist will help ensure that your store is ready for launch day.
The Shopify store setup is a very essential step that begins after you are done with creating a Shopify account and selecting a suitable plan for your online store. With a few additional steps, you can turn your Shopify store into a lean, mean selling machine!
New to Shopify??? Don’t worry. This step-by-step Shopify store launch checklist will take you through everything you need to do to get your store up and running, from selecting a theme to final testing.
Let’s get started…
- 1. Set up a maintenance mode or coming soon page
- 2. Add a domain name for your Shopify store
- 3. Set up payment methods
- 4. Choose a theme for your Shopify store
- 5. Customize the design of your store
- 6. Add products to your online store
- 7. Write a compelling “About Us” page
- 8. Create stunning product pages
- 9. Gather customer reviews and testimonials
- 10. Specify the delivery methods
- 11. Install apps from the Shopify App Store
- 12. Add Terms of Service and other Policy pages
- 13. Organize your site menus and navigation
- 14. Set up an email marketing platform
- 15. Add some sales channels for more revenue streams
- 16. Set up your shipping rates and taxes
- 17. Get your customer service ready
- 18. Set up Google Analytics
- 19. Submit your sitemap to search engines
- 20. Invest in search engine optimization (SEO)
- 21. Add a blog section to your online store
- 22. Set up your Store Language
- 23. Keep your contact details visible and up-to-date
- 24. Create launching discounts and coupon codes
- 25. Test your Shopify store before launching
- Shopify store launch checklist ends here!
1. Set up a maintenance mode or coming soon page
When you’re preparing to launch a new website, it’s important to make sure that it’s going to make a good first impression. After all, you don’t want prospective customers to see a half-finished site and get the wrong idea about your business.
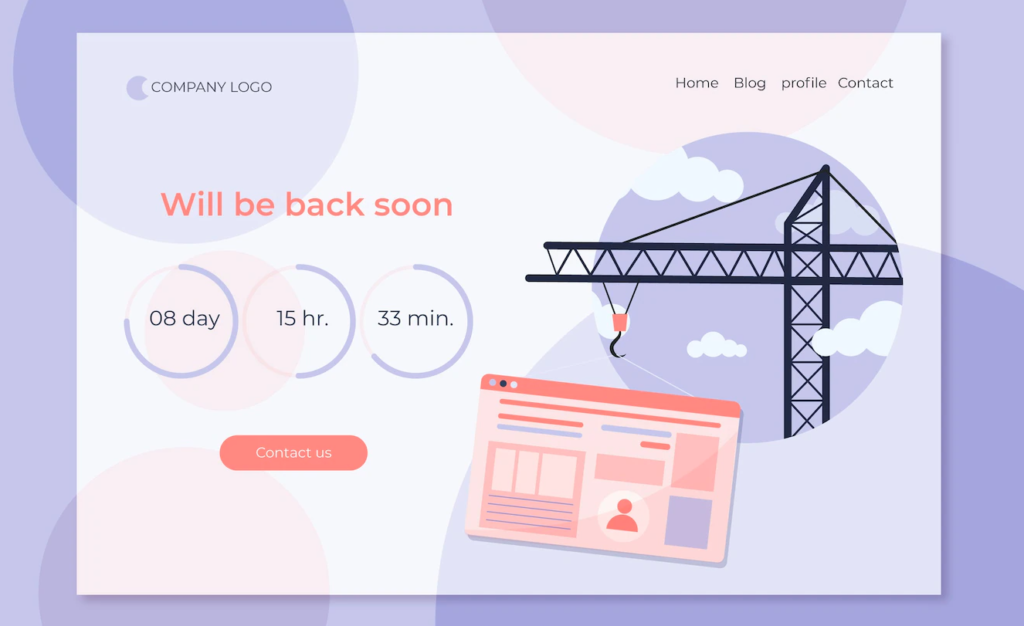
Fortunately, there’s an easy way to avoid this problem: simply put your store into maintenance mode or create a coming soon page (Let us know if we can help you with Shopify custom landing page development). This will let your customers know that your store is under construction and will be launching soon.
You can also ask your visitors to drop their email addresses to get notified about the launch date of your store. This way, you can start building a list of potential customers even before your store is open for business.
Shopify store owners can also use the password protection page to put their store into maintenance mode. Check out the best Shopify Apps for Coming Soon page.
2. Add a domain name for your Shopify store
Your Shopify store is the home for your eCommerce business on the internet. It’s where you showcase your products and services, share your story, and build relationships with your customers.
And just like any home, your Shopify store needs a unique address that shows off its personality and helps people find it easily. That’s where a custom domain name comes in.
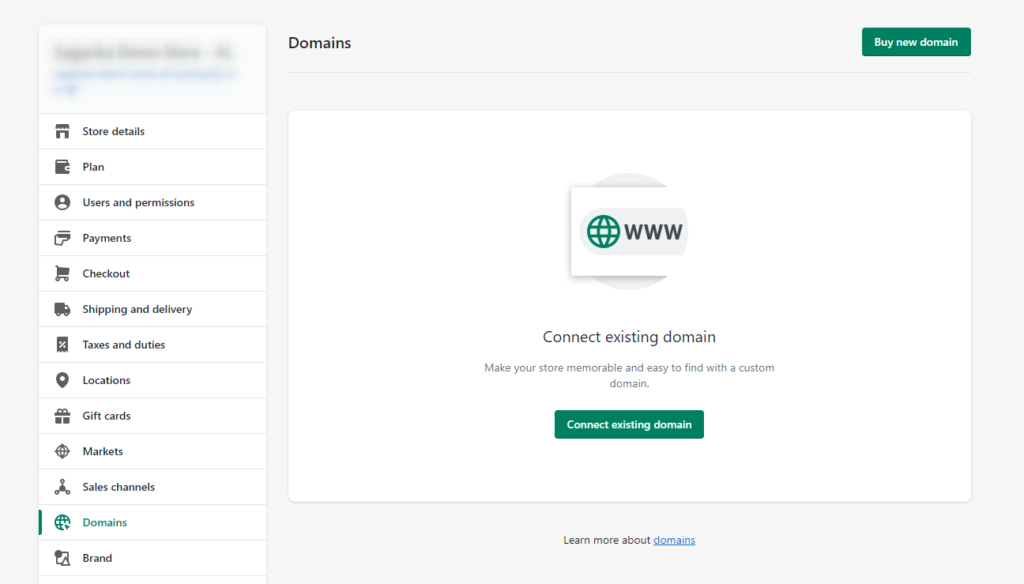
Adding a custom domain name to your Shopify store is easy, and it’s necessary to build a strong online presence (brand recognition). From your Shopify admin, go to Settings > Domains > Connect existing domain.
3. Set up payment methods
As an online store owner, it’s important to set up payment methods that are both convenient for your customers and secure for your business. Shopify offers various payment options to choose from.
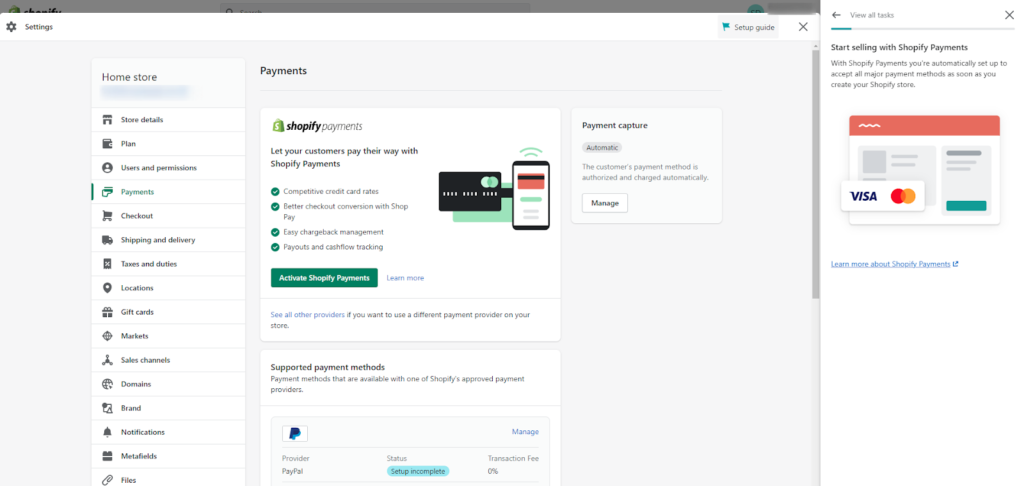
You can either choose Shopify payments or a third-party payment gateway like PayPal. If you’re just starting out, we recommend using Shopify payments as it’s the easiest way to get set up and start accepting payments with Shopify.
To set up Shopify payments, go to your Shopify admin and click Settings > Payments. From there, you can enter your business information and choose the credit cards that you want to accept.
If you want to save your customers from filling in card details and going through the lengthy checkout process, you can offer them other online payment options like Meta Pay, Amazon Pay, Apple Pay, etc.
Whichever option you choose, make sure you take the time to set up your payment methods properly. A few minutes of extra work now can save you a lot of headaches down the road. Choose from the best Shopify payment methods!
4. Choose a theme for your Shopify store
In order to have a successful Shopify store, you must choose a theme that is both visually appealing and functional.
The theme you choose will be the foundation upon which your entire storefront is built, so it is important to take some time to browse the available options and select one that best suits your needs.
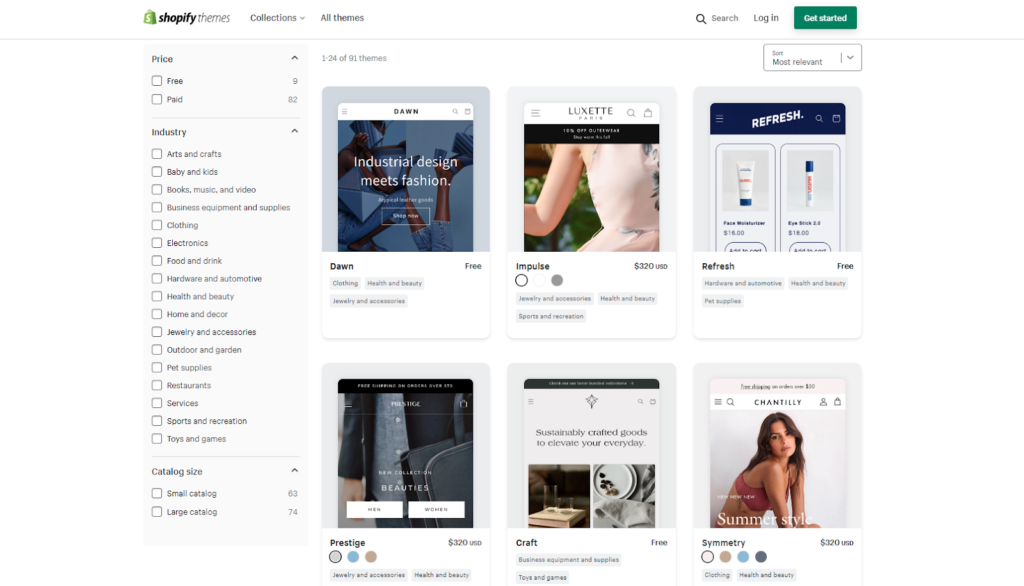
While there are many free and paid themes available in the Shopify theme store [1], making the right choice can be daunting. However, with a little bit of research, you can find the perfect theme for your store.
Must Read: Shopify 2.0 themes: 10 Best Free & Paid themes for your Shopify store
5. Customize the design of your store
Your Shopify store will be the face of your eCommerce business. So why settle for a generic design that looks like everyone else’s?
With a little effort, you can easily customize the design of your Shopify store to reflect your unique brand and style. You can change the colors, fonts, and layout of your store easily with your theme editor.
Go through the Shopify theme customization tutorial to get the best out your Shopify theme without touching the code files.

By adding a few lines of code to the Shopify store theme, you can create a one-of-a-kind shopping experience for your customers. For that, you may need an experienced Shopify developer or designer to help you get the most out of your store’s design.
If you are in search of a trustworthy and experienced Shopify development team, Mint Your Store can be a great tech partner for you. So don’t wait any longer – start customizing your Shopify store today!
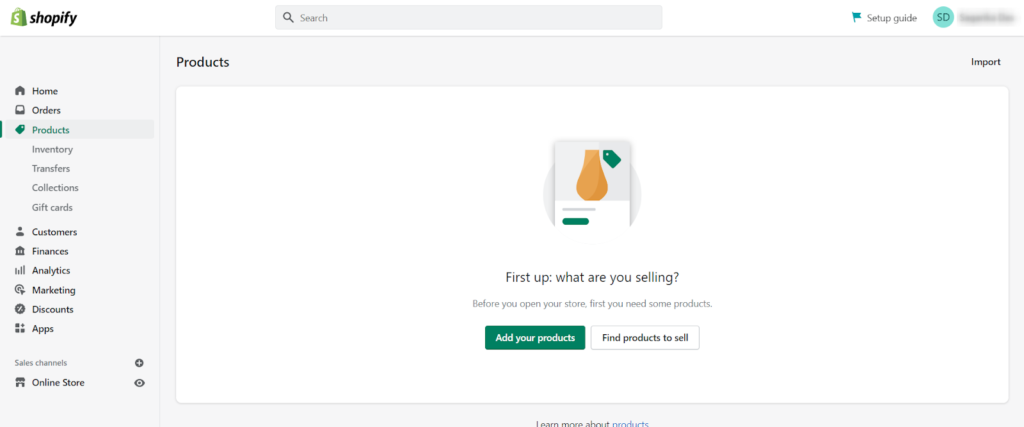
6. Add products to your online store
Adding products to your Shopify store is easy, and there are a few different ways to do it. The simplest way is to add products manually, one at a time. This is a good option if you have a small number of products, or if you want to have more control over the product information that is displayed in your store.
To add a product to your Shopify store, go to your Shopify admin and click Products > Add product. From there, you can enter your product’s information, including its name, price, description, and more. You can also add images, videos, and other media to your product pages.
Another option is to add products using a CSV file. This is a good choice if you have a lot of products to add to your store.
Must Read: 10 Best Products to Sell on Shopify: Niche & Product Ideas
7. Write a compelling “About Us” page
Your “About Us” page is one of the most important pages on your eCommerce website. It’s an opportunity to tell your story, build trust with your customers, and explain what makes you and your products unique.
When writing your “About Us” page, be sure to include the following:
- A brief history of your company
- Your mission statement
- An overview of your products and services
- Your company’s values
- Any awards or recognition you’ve received
- Your team members and their bios
- High-quality images
When creating an About us page for your online store, make it as compelling as your Homepage. I know it’s difficult to find ready-made templates for building a custom About us page in Shopify. But still, you can make an effective Shopify About us page.
8. Create stunning product pages
Your product pages are the heart of your eCommerce website. Here the customers come, learn about your products and make purchase decisions. Therefore, it is important to put some extra effort into creating an exceptional product page that will convert visitors into customers.

Some of the key elements of a great product page
- A catchy product title
- Product images and videos
- Compelling product description
- Product features, benefits, usage
- Shipping and return information
- Estimated delivery date
- Customer reviews and testimonials
- Product recommendations
Read More: Shopify Product Page: 7 Best Customization Tips With Examples
9. Gather customer reviews and testimonials
One of the best ways to build trust with potential customers is to showcase customer reviews and testimonials on your own eCommerce store. When customers see that others have had positive experiences with your products and services, they are more likely to do business with you.
Before you can start gathering customer reviews, you need to have a system in place for collecting them. Check out the top 10 product reviews apps in Shopify.
There are a few different ways to do this:
- Send an email to customers after they make a purchase, asking them to leave a review.
- Include a link to your review page in your post-purchase email.
10. Specify the delivery methods
Customers should have the convenience to choose a delivery method that suits them the best. Shopify offers various order delivery options like shipping, local pickup, and store pick-up. Why stick to only the shipping option?

You should offer all the possible delivery methods to the customers based on their location and the products they are buying from your store. This will help you give the best delivery experience to your customers and can reduce shopping cart abandonment.
For example, If you have a physical store, you can offer a store pick-up option to your shoppers for faster order delivery.
Read More: How to Add ‘Cash on Delivery’ Option in Shopify
11. Install apps from the Shopify App Store
The Shopify Apps [2] is a great resource for adding features and functionality to your eCommerce store.
You can add some Shopify apps to your online store based on what additional features you want to offer to your visitors.
Some of the most popular Shopify apps
- Printful: for on-demand printing and dropshipping
- Oberlo: for product sourcing and dropshipping
- Bulk Discounts: for creating bulk discounts and pricing rules
- Trustpilot: for collecting and displaying customer reviews
- Zendesk Chat: for live chat support
- Mailchimp for Shopify: for email marketing
Sometimes adding many third-party apps may slow down your online store and impair the performance and web accessibility. Therefore, you should add only the essential apps to your Shopify store.
If you need any assistance in integrating third-party apps, we are here to help you. We offer seamless Shopify integration services to help you take your business to the next level.
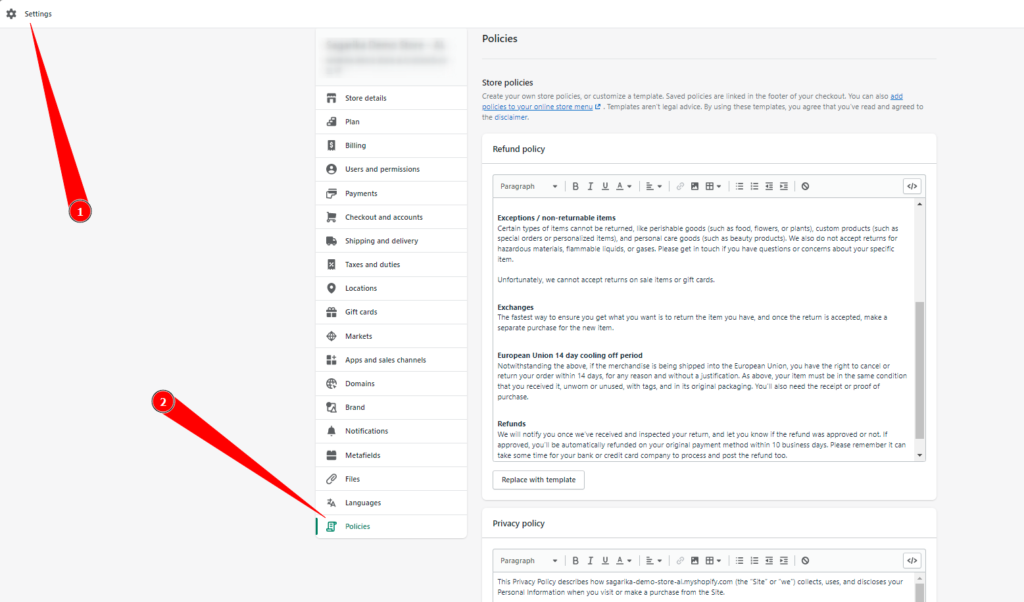
12. Add Terms of Service and other Policy pages
As an eCommerce business owner, it’s necessary to have Terms of Service and other policy pages on your website. These pages establish the rules and regulations for visitors to your site and help to protect you from legal liability.
Some of the must-have policy pages that you should consider adding to your eCommerce website include:
- Terms & Conditions
- Privacy Policy
- Shipping Policy
- Return and Refund Policy
You can create these pages yourself or use Shopify templates to generate them for you.
13. Organize your site menus and navigation
Your store’s navigation should be designed to help your customers find what they’re looking for quickly and easily. When organizing your site menus, keep in mind that less is more. You don’t want to overwhelm visitors with too many choices.
Here are a few tips for organizing your site menus and navigation:
- Organize your products into collections.
- Add search functionality to help visitors find what they’re looking for.
14. Set up an email marketing platform
With Shopify’s built-in email system, you can send automatic emails to your customers based on certain triggers, such as abandoned carts or new product releases. You can customize the email templates to give a personal touch to each message.
In addition to the built-in email system, there are also many excellent email marketing platforms that integrate with Shopify, such as Mailchimp, Klaviyo, and AWeber.
You can also use them for marketing purposes or to send manually triggered emails, like a welcome email to new subscribers.
15. Add some sales channels for more revenue streams
In addition to selling on your own website, you can also sell on marketplaces like Amazon and eBay, or through social media platforms like Facebook and Instagram. This gives you more opportunities to reach new customers and generate sales.
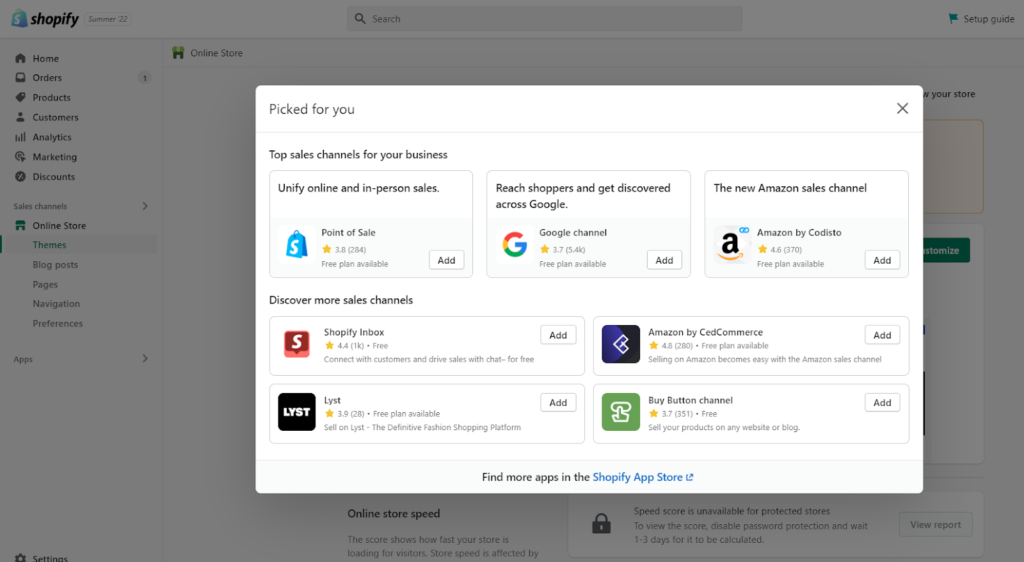
When setting up your sales channels, it’s important to consider the following:
- The products you want to sell
- The platforms you want to sell on
- How you will fulfill orders
- How you will manage inventory
Each sales channel has its own setup process, so be sure to follow the instructions for each one.
16. Set up your shipping rates and taxes
Now that you’re ready to start selling, you need to set up your shipping rates and taxes. This will ensure that you’re charging the correct amount for each order and that you’re complying with tax laws in your jurisdiction.
To configure the shipping and financial settings, log in to your Shopify admin and go to Settings > Shipping and delivery. From there, you can add your shipping costs, zones, and methods.
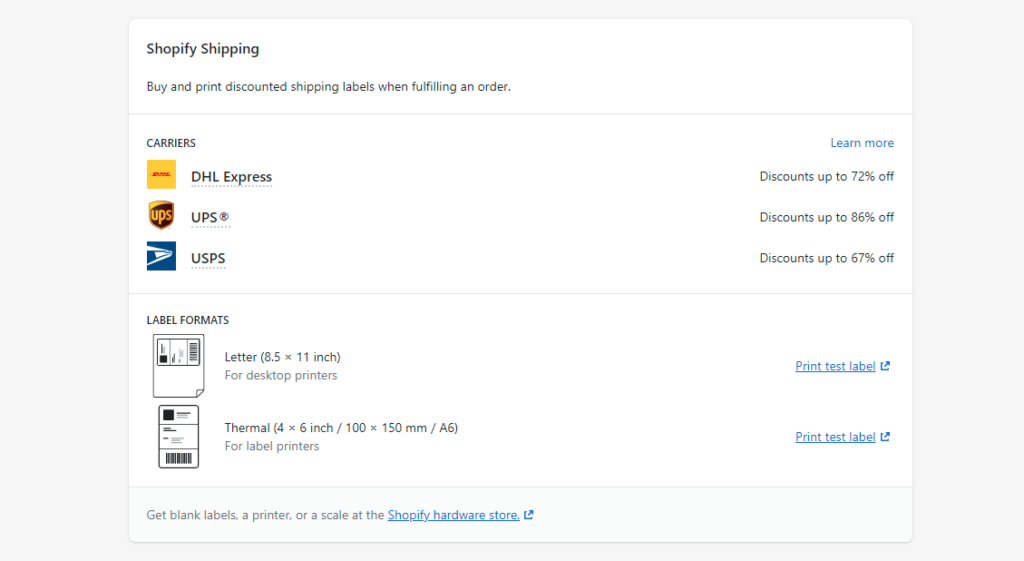
To set up your taxes, from the Shopify dashboard go to Settings > Taxes and duties. From there, you can add your tax rates and configure your tax settings.
Read More: 10 Best Shopify Shipping Apps for your Online Store
17. Get your customer service ready
A happy customer means positive feedback and a potential returning customer which means more sales. On the other hand, an unhappy customer could lead to negative reviews and decreased sales.
Therefore, before you launch your brand new Shopify store and welcome shoppers, you need to set up a customer support service for handling inquiries, returns, and refunds. This will ensure that you can handle any customer service inquiries or issues that may arise.

There are a few things to consider when setting up your customer service:
- What customer service channels will you use? (e.g., phone, email, live chat)
- Who will handle customer service inquiries?
- What are your customer service hours?
- What is your customer service policy?
It’s important to set up your customer service in a way that will provide the best possible experience for your customers.
Read More: 10 Best SEO Apps For Shopify to Boost Your Store Visibility
18. Set up Google Analytics
Google Analytics means more valuable insights. You can track important information, such as where your visitors are coming from, what pages they’re looking at, and how long they’re staying on your site.
With Google Analytics, you not only track your website traffic and site performance but also your marketing campaigns, and conversion rates. This data is important for understanding your customers and making informed decisions about your marketing and business strategy. Here is the complete guide to help you integrate Google Analytics 4 with your Shopify store.
19. Submit your sitemap to search engines
One important step of the Shopify launch checklist is to ensure that your customers can actually find your site by submitting your sitemap to search engines.
A sitemap is a file that lists all the pages on your website, and submitting it ensures that search engines have up-to-date information about your site.
In addition, the Search Console provides valuable insights into the keywords that people are using to find your site. Armed with this information, you can fine-tune your site to ensure that it’s appearing in search results for the right reasons.
20. Invest in search engine optimization (SEO)
If you want to drive organic traffic to your Shopify business, you need to improve your site’s ranking in search engine results pages (SERPs).
This can be done through Search Engine Optimization (SEO), which is the process of optimizing a website to rank higher in search engine results, which in turn drives more traffic to the site.
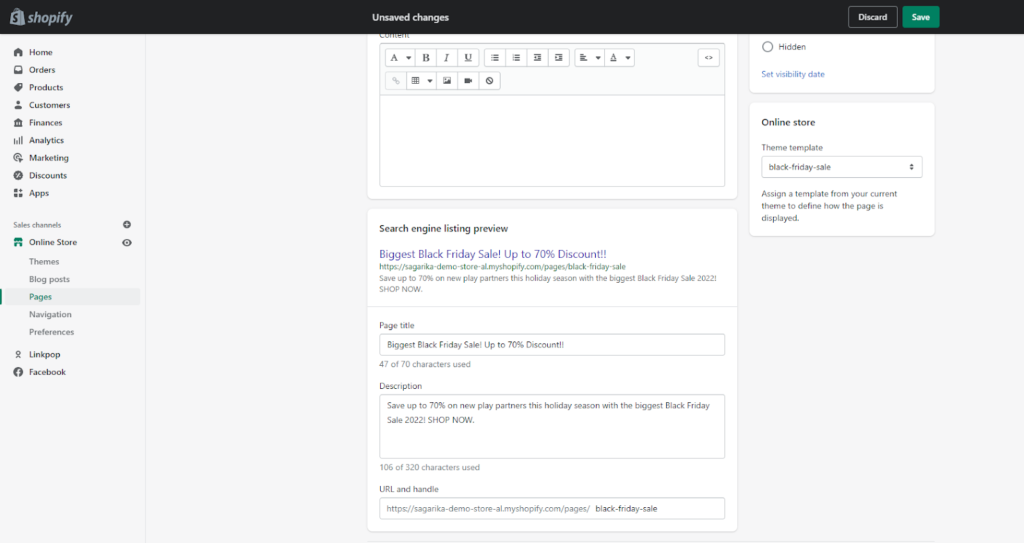
For Shopify stores, there are a number of simple SEO tips that can be implemented to improve the site’s ranking.
- Choose a catchy, unique name for the store that includes relevant keywords.
- Create well-written, keyword-rich product descriptions.
- Use high-quality images and videos that show off the products in the best light possible.
- Add SEO title and meta descriptions for every product, collection, and page in your store.
By following these tips, you can help improve your Shopify SEO and drive more traffic to your site. If you need dedicated Shopify SEO experts for your store, we would like to help.
21. Add a blog section to your online store
Almost all e-commerce websites publish blogs these days and there is a good reason behind it. By having a blog on your website, you can attract more organic traffic, improve your website’s SEO, and build a connection with your target audience.
You can use the Shopify blog to write informative articles about your products, share behind-the-scenes content, or anything else that would be of interest to your target audience.
Not only will a blog help you attract more traffic to your website, but it will also give you a chance to build a rapport with your customers and establish your brand as an authority in your industry.
22. Set up your Store Language
When you’re setting up your Shopify store, you need to make sure that you configure the default language for your eCommerce website. This can be done from the general settings in your Shopify admin.
Depending on your target audience, you might want to consider setting up multiple languages for your store. With Shopify, you can also add multiple language versions to your store, which is useful if you want to target customers in multiple countries.
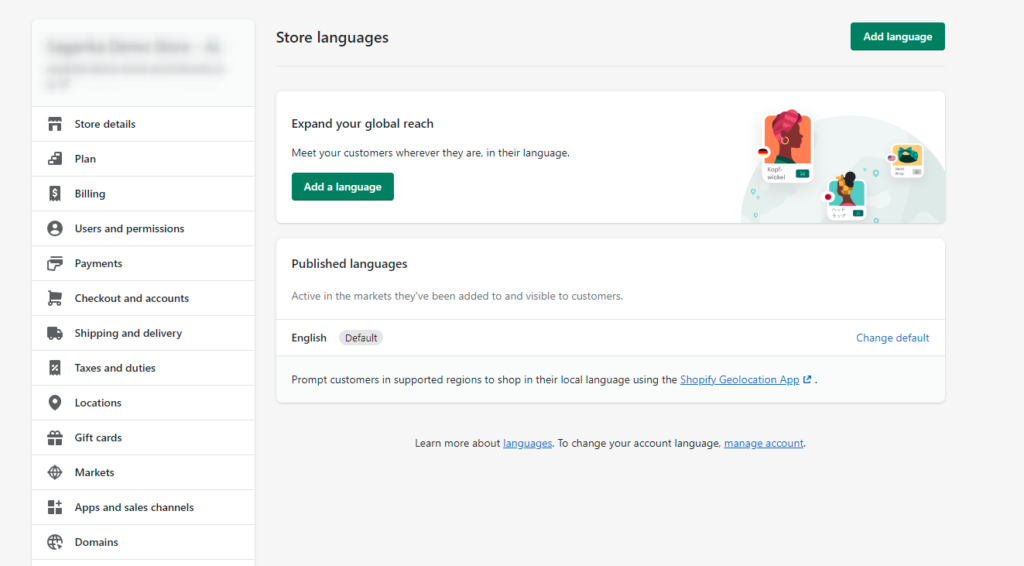
For that, go to Settings > Languages and add multiple languages and make your own online store ready for international sales.
23. Keep your contact details visible and up-to-date
There can be endless business opportunities waiting for you after launching your Shopify store. So, it’s important to keep your contact information up-to-date, so that potential customers and partners can easily reach you.
The best way to do this is to add a contact page to your website so that people can reach you by filling out the form and submitting it. Alternatively, you can also add your contact information to the footer of your website, so that it’s visible on every page.
24. Create launching discounts and coupon codes
If you want to create a buzz around your launch and drive traffic to your store, consider offering discount codes. This is a great way to entice customers to visit your store and make a purchase.
Even if they don’t place any order, they would get familiar with your brand and the type of products you offer. This way, they are more likely to come back and make a purchase in the future.
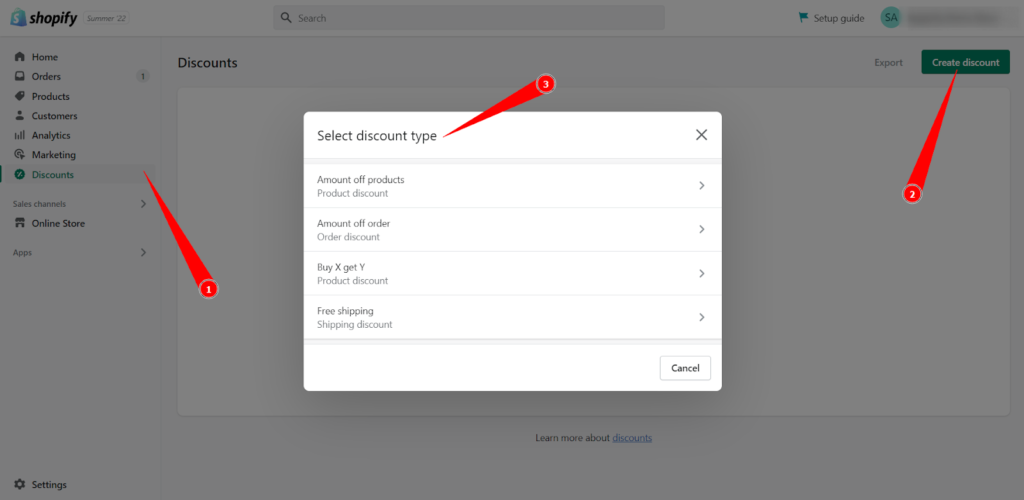
So, consider offering discounts or coupons, and also be ready with the pre-launch marketing plan for your online business.
25. Test your Shopify store before launching
All your efforts would get wasted if your customers face issues while placing orders at your store. It can be anything: the coupon isn’t working, the shipping price isn’t updating, or the payment gateway is down.
All these issues can lead to abandoned carts and ultimately result in lost sales. So, it’s important to test your shopping cart and checkout process thoroughly before you launch your Shopify store.
You can create a dummy account and place an order to see if everything works as it should. Alternatively, you can also ask your friends or family members to place an order at your store and give you feedback.
Shopify store launch checklist ends here!
Doing a pre-launch checklist can save you from a lot of last-minute scrambling and stress. These were some of the essential things that you need to do before launching successful Shopify stores.
By following this Shopify setup checklist, you can be sure that you have covered all the basics and are well on your way to a successful launch. In case, you need a helping hand, our Shopify store setup experts will help you.
Hope you enjoyed the read and found this post helpful. If you have any questions or suggestions, feel free to leave a comment below!